Published: May 13, 2026 Last Updated 2 months ago by FPN
Many women apply blush the same way they always have: smiling, locating the apples of the cheeks, and swirling on color. While this method is simple and familiar, professional makeup artists suggest it may not be the most flattering approach.
Blush placement significantly impacts your overall appearance. The difference between a fresh and a tired look often comes down to where blush is applied, not just the shade or formula. Most professional artists recommend a simple technique that creates an instant, visible lift—no needles, contouring kits, or lengthy routines required.
The key is to apply blush with your face at rest, start higher on the cheek than usual, and blend upward toward your temples. This simple adjustment can noticeably enhance your appearance
This guide explains how to master blush placement for a lifted, sculpted, and youthful look. It covers face shape-specific techniques, current trends, and practical, artist-approved tips.
Why Blush Placement Matters More Than You Think
Blush is often overlooked, yet it plays a fundamental role in revitalizing your complexion. While mascara enhances the eyes and lipstick adds polish, blush restores vibrancy to the face.
When applied correctly, blush can:
- Lift sagging cheeks by drawing the eye upward
- Create the illusion of higher cheekbones without contouring
- Balance face shapes by adding width or length where needed
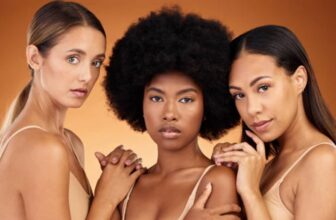
- Mimic a natural, healthy flush that makes you look rested and radiant
 Photo courtesy
 However, incorrect blush placement, such as applying it too low or too centered, can make features appear tired, older, or unbalanced.
Fortunately, correcting blush placement is a simple adjustment. No new products, special tools, or advanced skills are required—just an understanding of optimal placement.
The Universal Lifting Technique That Works for Everyone
Before addressing face shapes, consider a technique suitable for most individuals. Professional makeup artists refer to this as the “sculptor’s touch” or “lifted blush” method.
The Rule: Apply your blush high on your cheekbones—right along the bone itself—and blend upward toward your temples. Stop before you reach your hairline.
Why It Works: This placement replicates the natural shadows and highlights of defined cheekbones. Applying color above the cheek’s apple creates the appearance of a more lifted and sculpted face
How to Do It:
- Find your cheekbone by feeling the bone beneath your skin
- Using a fluffy brush, place your blush directly on top of that bone
- Blend in small circles, moving upward and slightly outward toward your ear
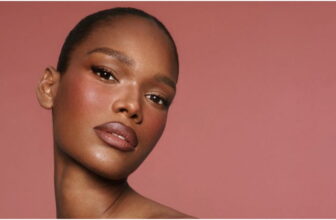
- The colour should be most concentrated at the highest point of your cheekbone and fade as it moves down
 Photo courtesy
 Pro Tip: Celebrity makeup artist Jamie Greenberg suggests starting with less product and building gradually. “Try not to go straight from product to skin,” she advises. “By working the product into the bristles first, you will have a softer, more airbrushed quality to the application.”
Face Shape Matters: Finding Your Perfect Placement
While the lifting technique works beautifully on many faces, the most flattering blush placement varies with your unique bone structure. Here’s a breakdown by face shape, based on expert advice from professional makeup artists.
Round Face Shape
Goal: Elongate and define.
For round faces, where the cheeks are the widest part, and angles are minimal, the goal is to create the illusion of length and structure.
The Technique: Apply blush slightly above the apples of your cheeks, angling it up toward your temples. This elongates the face and creates more defined cheekbones. Take the colour all the way toward your hairline for a continuous lifting effect
What to Avoid: Don’t concentrate blush on the apples of your cheeks—this will only emphasize roundness and make your face appear wider.
Square Face Shape
Goal: Soften angular features.
Square faces feature a strong jawline and angular forehead. The objective is to introduce roundness and softness.
The Technique: Apply blush lower on your cheeks, focusing on the central area of the cheek rather than the outer edges. Blend softly toward the sides, but keep most of the colour closer to the centre of your face. This softens the focus on your jawline.
Pro Tip: Makeup artist Jeanine Lobell suggests using a two-colour ombré technique—a soft peach higher up and a bright pink on the apples—to cut the boxiness of a square face.
 Photo courtesy
 Oval Face Shape
Goal: Maintain balance.
Oval faces are often considered balanced and require minimal correction; the focus should be on subtle enhancement.
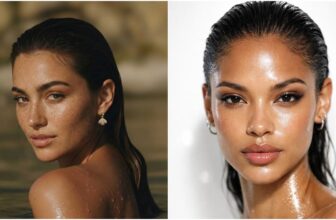
The Technique: Apply blush flat and soft directly on your cheekbones, then blend gently. You can also apply a tiny bit of blush to the centre of your chin to shorten the face slightly
What to Avoid: Very contoured looks can make an oval face appear longer than it actually is, so keep your blush soft and blended.
Heart-Shaped Face
Goal: Balance a wider forehead with a narrower chin.
Heart-shaped faces usually have high, prominent cheekbones and a tapered chin. The aim is to soften the cheekbones rather than emphasize them.
The Technique: Apply blush to the widest part of your cheekbones, but blend very gently so the colour ends around the outer corner of your eye. Don’t extend the blush too far toward your temples—this can overemphasise cheekbones that are already prominent.
Pro Tip: Keep the blush application high and tight to the outer corner of your eyes, and avoid bringing colour onto the apples of your cheeks.
 Photo courtesy
 Long Face Shape
Goal: Add width and shorten the appearance.
Long faces are noticeably longer than they are wide, often featuring a high forehead and an extended chin area.
The Technique: Apply blush directly at the outer corner of your eye. Instead of blending toward your temples, blend straight toward your ear in a horizontal line. This adds width to the face, balancing its length.
Trending Techniques: The Blush Hacks Taking Over Social Media
Recent trends on platforms like TikTok and Instagram have introduced several new blush techniques. The following are those worth considering.
Down Blushing: A Soft, Natural Alternative
Created by Dominic Skinner, Director of Artistry at MAC Cosmetics, “down blushing” flips the traditional lifting technique on its head—literally. Instead of sweeping blush upward, Skinner recommends brushing colour down from the top of your ear toward the centre of your face.
Why It Works: This technique creates a softer, fresher look that mimics a natural flush rather than a sculpted one. It’s perfect for daytime wear or when you want your makeup to look like skin, not makeup.
How to Try It: Layer two shades—a deeper tone from your ear toward your mouth, then a lighter shade blended from your ear across your nose. This creates natural-looking warmth without an overdone appearance.
W-Shaped Blush: The Viral Winter Trend
The W-shaped blush trend, named for the pattern it creates, involves sweeping blush from one cheekbone across the bridge of the nose to the other cheekbone, forming a gentle “W” shape.
Why It Works: This placement creates that coveted “just came in from the cold” flush while subtly lifting the face. Connecting the cheeks and nose creates a more harmonious, youthful effect that photographs beautifully.
How to Try It: Smile slightly to locate the apples of your cheeks, then use blush to draw a soft “W.” Begin at the top of one cheekbone, sweep gently across the nose bridge, and finish on the other cheekbone. Blend thoroughly for a diffused effect.
Blush Contouring: Colour Instead of Shadow
Also known as “blush draping,” this technique originated in the 1970s and has made a major comeback. Instead of using bronzer or contour powder to sculpt your face, you use blush.
Why It Works: The result is softer and more natural than traditional contouring. You get definition without harsh lines, and the colour adds life to your face rather than dulling it with shadows.
How to Try It: Apply blush just underneath your cheekbones—where you would normally put contour. Blend upward toward your temples. Choose a shade that’s deeper than your usual blush but still has warmth.
Product Tips: Choosing the Right Blush for Lifting
Not all blushes are equally effective for lifting techniques. Experts recommend the following considerations.
Cream vs. Powder
Cream blushes are ideal for achieving a natural, skin-like finish. They melt into your complexion and move with your expressions, making them perfect for the “fresh flush” look. They’re also excellent for creating that plump, hydrated appearance that mimics cheek filler.
Powder blushes offer more control and staying power. Professional makeup artist Nydia Figueroa prefers powder for contouring techniques because “it stays put when applied so you won’t have to worry about it losing its shape as the day goes on”.
For best results, apply a cream blush first, set it with translucent powder, and then layer a powder blush on top. Makeup artist Jamie Greenberg notes that this technique “gives you a longer-lasting blush for the whole day”.
 Photo courtesy
 Shade Selection for Lifting
For a lifting effect, choose shades that are:
- Neutral or cool-toned rather than warm (warm tones can make features appear heavier)
- Deeper than your natural flush but still clearly a blush, not a contour
- Buildable, so you can control intensity
For deeper skin tones, berry shades, rich roses, and deep corals work beautifully. For lighter skin tones, mauves, soft pinks, and peaches are excellent choices.
Recommended Products to Use
The best blushes to buy in 2026 are all about skin-like colour, soft-focus finishes, and long-lasting wear that melts naturally into the complexion.
This year’s standout formulas move away from overly powdery textures and lean into creamy, blurring finishes that create a healthy flush without looking heavy. From buttery cream blushes and lightweight liquid tints to baked powders with a satin glow, the focus is on buildable colour that enhances the skin rather than sitting on top of it.
Shades like soft berry, warm peach, rosy nude, and sunburnt pink are dominating beauty trends, offering fresh, youthful warmth across different skin tones. Whether you prefer a barely-there everyday flush or bold, draped cheeks, 2026 blush trends prioritise radiance, blendability, and a natural-looking finish that lasts all day.
Caia Blush
 Photo Courtesy
Rare Beauty Blush
 Photo Courtesy
Dior Backstage rosy glow
 Photo Courtesy
Rhode Pocket blush in ‘sleepy girl’
 Photo Courtesy
Patrick Ta Beauty
 Photo Courtesy
 Common Mistakes to Avoid
Even with good intentions, common blush mistakes can occur. The following are important to avoid.
- Mistake #1: Smiling While Applying
That classic “smile and apply to the apples” trick actually backfires. When you relax your face after smiling, your cheeks drop—taking your blush with them. Apply blush with your face at rest for accurate placement.
- Mistake #2: Placing Blush Too Low
Low blush drags the face down, making you look tired and older. As a rule, keep blush on or above your cheekbone, never below it.
- Mistake #3: Using the Wrong Brush
A brush that’s too small will deposit colour in stripes. A brush that’s too large will diffuse colour where you don’t want it. A medium, fluffy, slightly angled brush is ideal for precise but blended application.
- Mistake #4: Skipping the Blend
Harsh lines have no place in blush application. “You don’t want to have hard edges,” says Figueroa. Blend until you can’t tell where the blush begins or ends.
- Mistake #5: One Shade Fits All
Your face has different planes that catch light differently. Consider using two shades—a deeper one for sculpting and a brighter one for the apples—to create dimension.
Final Thought
The most important thing to remember about blush is that rules are meant to be adapted. Face shape charts and artist techniques are starting points, not commandments. “No matter your methods for accentuating your features, always keep in mind that you are unique,” says makeup artist Nick Lujan. “Follow the curves of your unique features, and don’t copy what others are doing.”
The lifting technique, which involves placing blush high on the cheekbones and blending upward, is a significant improvement over the traditional “smile and swirl” method. Once tried, many find it preferable.
Apply your preferred blush, position your brush slightly higher, and blend toward your temples. This approach will result in a fresher, brighter, and more lifted appearance.
And the best part? No filler required.
Photo Courtesy
You May Also Like:
Here's Why People are Taking a Break From Retinol in their Skincare Routines
July 6, 2026The Rise of AI-Powered Skincare Routines
July 1, 2026Cherub Cheeks Are Beauty's Newest Obsession
June 29, 2026Beach Skin vs Glass Skin: Which Summer Skin Trend is Winning?
June 25, 20268 Best Tinted Sunscreens for Coverage and Daily SPF Protection
June 23, 2026The Skincare Habits that Make a Difference in Summer
June 22, 2026Polyglutamic Acid May Be the Secret to Plumper, More Hydrated Skin
June 21, 20267 Good Reasons You Should Break Up with Your Makeup Artist
June 16, 2026Olandria Carthen and Painted by Esther Champion MAC Cosmetics’ Blush for Dark Skin
May 29, 2026The Highlighter Test: How to Glow Without Looking Greasy
May 20, 20267 Best Liquid Eyeliners for Clean Lines and Dramatic Wings Alike
May 15, 2026Your Makeup Bag Is Lying: 9 Products You Need to Toss Now
May 14, 2026

Esther Ejoh is a Fashion Editor at Fashion Police Nigeria, where she writes all things fashion, beauty, and celebrity style, with a sharp eye and an even sharper pen. She’s the girl who’ll break down a Met Gala look one minute, rave about a Nigerian beauty brand the next, and still find time to binge a movie or get lost in a novel. Style, storytelling, and self-care? That’s her holy trinity.