Published: November 22, 2023 Last Updated 3 months ago by FPN SEO
While indulging in a DIY beauty regimen can be a delightful part of #SelfCareSunday, bleaching your hair at home doesn’t fall under the same umbrella as applying your face mask, as it requires care and precision.
Traditionally, this process has been entrusted to skilled professionals in salons, as it involves chemicals that break down protein bonds, lift pigment, and inevitably cause some level of damage. Hair bleaching poses a risk, with improper processing potentially damaging the hair cuticle, resulting in dryness, brittleness, and, in severe cases, broken strands.
Yet, with evolving beauty treatments, many practices once exclusive to salons or spas, including hair bleaching, are now being done at home. The key lies in understanding the intricacies of the process and adopting meticulous measures to reduce potential harm.
For those who can’t resist the temptation of going the DIY route, we’ve put together tips, tricks, and professional advice you need to know on how to bleach your hair at home without causing excessive damage.
What Is Hair Bleaching?
Hair bleaching is the act of using a powerful chemical compound (bleach) to strip the color from your hair and eliminate the pigment from each strand. It’s among the simplest and fastest methods to decolorize your hair. After the bleach has effectively lightened your hair, you can then apply a hair dye to alter its color.
The natural color of your hair is determined by melanin, a pigment molecule. There are two varieties of melanin in human hair: eumelanin and pheomelanin. Eumelanin is the pigment responsible for the black and brown hues seen in human hair and skin, while pheomelanin is responsible for the red tones in hair. The differing ratios of these two types of melanin in individuals result in the wide range of hair colors we see. Bleaching agents work to lighten your hair by removing melanin from your hair strands.
Depending on the degree of lightening you desire, you can choose from two types of hair-bleaching agents. The first, known as a lightener, has the ability to bleach black hair to a brown color. The second, a more powerful agent often referred to as powder bleach, can lighten black hair to a much lighter shade.
Is bleaching your hair at home a bad idea?
Bleaching your own hair at home isn’t necessarily a bad idea, as long as it’s done right. In a salon, colorists ensure they don’t leave lightening products on too long or use high-volume developers that can harm your hair. If you’re doing it at home, it’s crucial to follow the instructions on the package to the letter.
However, if you have dark hair and want to go platinum a la Kim Kardashian, you won’t get there with just one bleach session. We suggest gradually going through different blonde shades, with a few months in between bleachings, to let your hair recover.
Before you start bleaching, your hair should ideally be healthy. Check for signs of excessive dryness, overprocessing, or a high number of split ends. To avoid damage, you might want to bleach only your roots instead of your whole head, as the roots are virgin hair that hasn’t been chemically treated. If you’ve never had your hair chemically treated or colored, you’re in luck; you’re less likely to damage your hair if you choose to bleach it yourself.
For an all-over blonde look, mix hydrogen peroxide and hair bleach. This combination strips the natural pigment and opens the cuticle, making it easier for the bleach to remove the color. Peroxide alone can cause brassiness and doesn’t lift as well as bleach.
If you prefer not to use bleach, a permanent hair dye can lighten your hair. Choose a shade two levels lighter than your natural color. Start applying the dye at the back of your head, then move to the sides and finish at the top for even bleaching. Use a silver toner to eliminate any yellow tones and brighten your shade.
While it’s possible to bleach black hair, we warn against going from black to platinum at once, as it can damage your hair. Instead, lighten your hair two shades at a time, with breaks in between, to prevent over-processing and potential hair breakage.
Supplies You’ll Need To Safely Bleach Your Hair
Choosing the right supplies for bleaching your hair is crucial for achieving the desired results while minimizing damage.
- Bleaching Powder:
- Look for a high-quality bleach powder. Choose a reputable brand known for effective and gentle formulations. Consider the strength of the powder, usually indicated by levels (e.g., 20, 30, 40 vol). Lower levels are less damaging but might be slower in lifting color.
- Developer (Peroxide):
- Select the appropriate developer strength based on your hair’s starting color and your desired level of lift. A 20-volume developer is suitable for lightening a few shades, while 30 or 40-volumes are more intense and reserved for darker hair or more significant lightening. Lower volumes are gentler on the hair.
- Plastic Bowl:
- Use a non-metallic bowl for mixing bleach. Metal can react with the chemicals, altering the results.
- Applicator Brush or Comb:
- Choose a brush or comb designed for hair application. Brushes offer precision, while combs are useful for larger sections.
- Sectioning Clips:
- Use clips to divide your hair into manageable sections. This ensures even application and helps you keep track of the areas you’ve already treated.
- Old Shirt or Towel:
- Wear an old shirt or a towel around your neck to protect your clothing from bleach stains.
- Gloves:
- Invest in disposable gloves to protect your hands from the harsh chemicals. Latex or nitrile gloves are common choices.
- Hair Conditioner:
- Have a quality hair conditioner on hand for post-bleaching treatment. This helps restore moisture and keeps your hair healthy.
- Tinting Brush or Comb:
- Use a tinting brush for precise application of the bleach, especially around the roots and face-framing sections.
- Petroleum Jelly:
- Apply petroleum jelly along your hairline and ears to create a barrier and prevent the bleach from irritating your skin.
- Plastic Shower Cap:
- Cover your hair with a plastic shower cap while the bleach processes. This helps retain heat, aiding the bleaching process.
- Timer:
- Have a timer on hand to track the processing time. Over-bleaching can damage your hair, so it’s essential to follow the recommended time.
When choosing supplies, consider your hair type, its current condition, and the level of lift you desire. If you’re unsure, consult with a professional or conduct a strand test to gauge how your hair will react to the chosen products. Always follow the instructions provided with each product for the best and safest results.
How to bleach your hair at home?
Before you start, here are some handy tips: Be close to a mirror to see your hair from all sides; apply bleach to dry hair; and start at the back, where the hair is usually darkest, as it needs more processing time. Now, let’s bleach!
- Gather Your Supplies:
-
- Bleaching powder
- Developer (peroxide)
- Plastic bowl
- Applicator brush
- Sectioning clips
- An old shirt or cape
- Gloves
- Hair conditioner
- Tinting brush or comb
- Plastic shower cap
- Timer
2. Protect Yourself:
- Wear old clothes to avoid staining.
- Put on disposable gloves to protect your hands from the chemicals.
3. Section Your Hair:
- Divide your hair into four sections using sectioning clips. This ensures even application.
4. Mix the Bleach:
- Follow the instructions on the bleach powder and developer packaging to create a smooth, consistent mixture in a plastic bowl. Use the tinting brush or comb to stir.
5. Apply Petroleum Jelly:
- Apply petroleum jelly along your hairline and ears to prevent the bleach from irritating your skin.
6. Begin Application:
- Start applying the bleach to one section at a time. Begin at the back, working your way to the front. Use the applicator brush for precise application.
7. Avoid the Roots Initially:
- Start applying the bleach about 1-2 inches away from your scalp. This allows the heat from your scalp to help the bleaching process, preventing uneven color.
8. Move to the Roots:
- After the lengths are covered, go back and apply bleach to the roots. Be meticulous to ensure even coverage.
9. Check Processing Time:
- Refer to the bleach instructions for the recommended processing time. Use a timer to avoid over-processing, which can damage your hair.
10. Monitor Color Change:
- Keep an eye on the color change. You may need to wipe away a small section to check the progress.
11. Rinse Thoroughly:
- Once the desired color is achieved, rinse your hair thoroughly with lukewarm water. Use a color-safe shampoo to remove any remaining bleach.
12. Deep Condition:
- Apply a deep conditioning treatment to restore moisture and nourish your hair. Leave it on for the recommended time.
13. Dry and Style:
- Gently towel-dry your hair and style it as desired. Avoid using heated styling tools immediately after bleaching.
14. Maintain with Care:
- Follow a post-bleaching hair care routine, including regular trims, deep conditioning, and the use of products designed for color-treated hair.
Post-care hair bleaching and maintenance
- Regularly scheduling trims is essential for maintaining healthy hair. If you’re feeling adventurous with your DIY skills, consider giving yourself a trim to eliminate fried ends resulting from the bleaching process. Using proper hair shears is crucial for a clean cut. Alternatively, opt for professional scissor work by scheduling a monthly appointment.
- Invest in purple shampoo to counteract brassiness in silver hair. Purple shampoo, like Wella Professionals Invigo Blonde Recharge Color Refreshing Shampoo Cool Blonde, is crucial for preserving cool tones and preventing rapid fading. Explore various purple shampoo options to find the right fit for your hair.
- Prioritize daily deep conditioning for a week post-bleaching to keep your hair hydrated and healthy. Briogeo’s Repair, Not Despair! Deep Conditioning Mask is a recommended choice for its hydrating and strengthening properties.
- Incorporate bond-repairing treatments weekly to restore your hair’s integrity and prevent excessive shedding. Popular choices include Olaplex No.0 Intensive Bond Building Treatment and No.3 Hair Repair Protector.
- Consistency is key; bleach your roots every four to six weeks to maintain the color without risking damage from prolonged root growth. Stay proactive in your hair care routine to enjoy vibrant and healthy bleached hair.
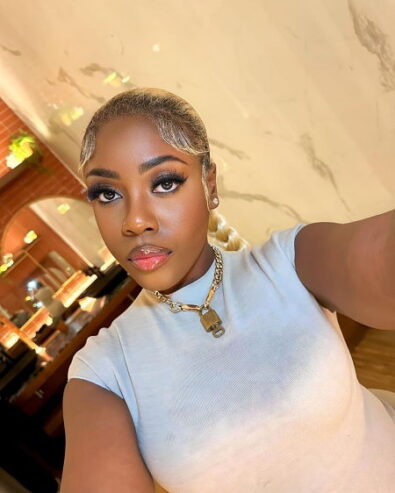
Photo: Instagram.com/nancyisime
You May Also Like:
Halo Braids Are So Back & You'll Probably Fall Hard
July 22, 2026Why You Should Get a New Hair Stylist Now
July 21, 2026Want Boho Braids Faster? Try This Viral 30-Minute Hack
July 9, 2026Fashion Girls Can't Get Enough of Micro Braids This Season
July 3, 2026Cardi B Stuns with Fiery Red Hair Transformation at 2026 BET Awards
June 29, 2026Beyoncé Shares an Insight Jay Z's Eight-Year Loc Journey and the Emotional Process
June 23, 2026Kim Kardashian Transformed into Marilyn Monroe with a Blonde Bob
June 21, 2026ELF Haircare Launches Affordable Luxury for Every Hair Type
June 16, 2026Reverse Hairstyling is the TikTok Trend Curly Natural Hair Girlies are Trying
June 15, 2026This Black-Owned Brand is Revolutionising Afro Pick Comb
June 5, 2026African Hair Oils and Their Deep Cultural Significance
June 5, 2026Are We Witnessing Another Natural Hair Movement in 2026?
May 21, 2026

Esther Ejoh is a Fashion Editor at Fashion Police Nigeria, where she writes all things fashion, beauty, and celebrity style, with a sharp eye and an even sharper pen. She’s the girl who’ll break down a Met Gala look one minute, rave about a Nigerian beauty brand the next, and still find time to binge a movie or get lost in a novel. Style, storytelling, and self-care? That’s her holy trinity.