You might think you’ve got painting your nails down, but perfecting an at-home manicure takes more than you’d expect.
If you’ve ever had a salon manicure, you know there’s often a big difference between professional nail designs and what you can do yourself. Just like how a quick makeup look at home might not match up to a professionally applied face, or a home pedicure can’t compare to the relaxation of a spa session, we need to recognize the expertise of nail technicians.
They can offer advice on nail and skin health that we might miss at home. Plus, painting your dominant hand with your non-dominant one is always a challenge!
Even with these hurdles, you can still improve your home manicure skills. With some nail care, proper preparation, and a few pro tips, you can achieve a neat, glossy, salon-style manicure at home. Follow our step-by-step guide to learn how to paint your nails like a pro.
Avoid Your Hands Being Moist
Always resist the urge to soak your hands for a spa-like experience, and even be cautious during your daily ablutions. It’s best not to do your nails right after a bath or shower. Nails are highly absorbent and soak up water like a sponge, causing them to swell temporarily.
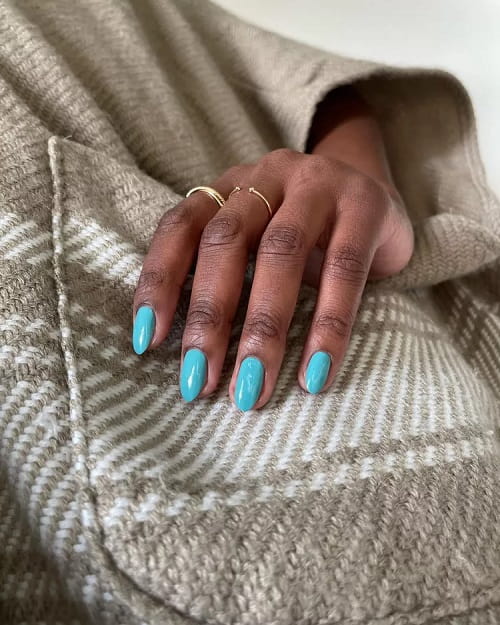 Photo: Lolosnailedit
 Once they return to normal size, this swelling can cause the nail polish to crack or chip. So, stay clear of any moisture for at least an hour before painting your nails (a perfect excuse to avoid washing dishes).
Remove Stubborn Pre-existing Nail Polish
Before starting your at-home manicure, ensure you thoroughly remove any remnants of previous polish. If you have gel or acrylic nails, these require professional removal at a salon. For regular nail polish, darker shades like deep reds, browns, and purples can be more challenging to remove compared to lighter, sheer colors.
Avoid using toilet paper, which can disintegrate when exposed to acetone. Instead, opt for absorbent cotton pads, preferably reusable ones for an eco-friendly beauty routine. Soak the pad in nail polish remover, and gently press it on the nail. Avoid applying too much pressure, as this can damage the nail surface.
Choose The Right Nail Polish
When selecting nail polish, it’s not just about the color. Opt for high-quality brands typically used in salons. Check if your polish is still usable by giving it a good shake; if it doesn’t blend smoothly, toss it out and get a fresh bottle. Using dried-out polish can lead to uneven and blotchy results.
File and Smooth Your Nails
Begin your manicure or pedicure with clean nails. Use a nail file to shape and smooth your nails, filing from the corners toward the center in one direction only. Avoid sawing back and forth, which can cause nail splintering and damage.
Buffing your nails, often overlooked in home manicures, improves blood circulation to the nail beds and creates a smoother surface for polish application. Use a buffer with different grit surfaces, starting with the roughest. Hold the buffer at an angle against each nail and move it towards the center, working from the base to the tip with gentle pressure.
Apply Base and Top Coat
Don’t skip the base and top coat—they’re essential for a professional-looking manicure. A base coat prevents polish from chipping and protects nails from damage. It also helps smooth out the nail surface and enhances polish adherence.
The top coat seals in the color, prevents chipping and adds a glossy finish. Opt for a fast-drying top coat to avoid smudges and ensure long-lasting polish.
Use A Fine-Tip Brush Around Cuticles
Dip a clean, fine-tip brush in acetone polish remover and gently outline around the cuticles. This prevents stray polish from sticking to the skin, achieving a salon-quality finish. After applying polish, moisturize your cuticles with oil or lotion to keep them hydrated.
Apply Nail Polish With Care
Before opening the nail polish bottle, roll it between your hands for 15-20 seconds to mix the polish without creating bubbles. When you pull out the brush, wipe one side clean and fan out the other along the neck of the bottle. Lightly tap off excess polish from the brush.
Apply polish in three strokes: start from the cuticle and glide to the tip, then swipe along the left and right sides of the nail. This technique ensures an even coat without applying too much polish at once. Allow each coat to dry before adding another. Apply one or two more coats for richness and finish with a top coat for shine and protection.
Clean Up and Let Your Nails Dry
After painting your nails, tidy up any mistakes or uneven edges. Wrap a small piece of cotton ball soaked in nail polish remover around the tip of a cuticle stick. Gently trace around your nails to remove excess polish. For precision, fold a nail polish remover pad into a triangle.
Allow your nails to dry for an additional five minutes. This extra time ensures your polish sets properly and avoids smudges, making your DIY manicure look impressive when you show it off.
Photo credit: Karolina Kaboompics
You May Also Like:
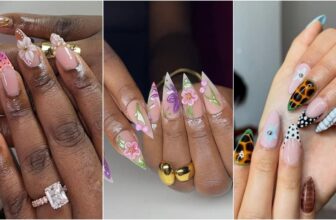
16 Nigerian Nail Artists Creating Some of the Most Detailed Sets on Instagram
March 20, 2026The 2026 Nail Trends You Should Know
January 29, 202635 Sweet and Romantic Valentine Nail Ideas You’ll Want to Bookmark
January 26, 202611 Lace Nail Ideas for the Perfect Vintage Manicure
January 19, 2026You Can Now Change Your Nail Colours with an App
January 13, 202617 Gold Nail Ideas You'd Want to Wear Now
December 27, 2025What You Need to Know About Nail Breakage: Causes and Solutions
December 22, 2025The Holiday Nail Polish Shades Everyone Is Wearing
December 17, 202514 Chic Ways to Wear Pantone's Cloud Dancer on Your Nails
December 9, 202511 Cute Halloween Nail Ideas To Enhance Your Spooky Look
October 8, 2025The Nail Shapes Everyone Will Be Wearing This Season
October 6, 202521 Skittle Nail Ideas That'll Give Your Manicure An Instant Upgrade
September 29, 2025

Esther Ejoh is a Fashion Editor at Fashion Police Nigeria, where she writes all things fashion, beauty, and celebrity style, with a sharp eye and an even sharper pen. She’s the girl who’ll break down a Met Gala look one minute, rave about a Nigerian beauty brand the next, and still find time to binge a movie or get lost in a novel. Style, storytelling, and self-care? That’s her holy trinity.