Acrylic nails are the ultimate beauty upgrade.
These nails are bold, long-lasting, and instantly elevate your hands—whether you’re going for a classic nude set or vibrant nail art. But as much as we love the transformation acrylic nails bring, there comes a time when you have to say goodbye to them, and that’s where things can get tricky.
You might be tempted to yank your acrylic nails off or bite around the edges (we’ve all been there), especially when they start lifting.
But removing acrylic nails improperly can lead to painful consequences: brittle nails, peeling layers, breakage, and even long-term nail bed damage. The good news? You don’t need to book a salon appointment or spend a fortune to take off your acrylic nails safely.
Removing acrylic nails at home is totally doable with the right tools, a bit of patience, and the proper technique. Whether you’re dealing with an overgrown set, prepping for a fresh new look, or just giving your natural nails a breather, this guide is here to help.
We’ll walk you through the safest ways to remove acrylic nails at home, with and without acetone, and offer tips to keep your natural nails healthy and strong afterward.
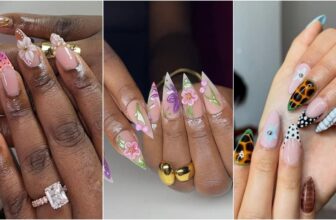
 Photo: Instagram/shapedbysummer__
 This easy-to-follow tutorial is perfect for beginners, beauty lovers, and anyone looking to protect their nails while switching up their style. So grab your tools, find a cozy spot, and let’s dive into the best ways to take off acrylic nails without the damage.
Tools You Need to Safely Remove Acrylic Nails at Home
Before diving into the removal process, it’s important to gather the necessary tools and products. Here’s what you’ll need to get started:
- Acetone (100% Pure): Acetone is the most effective product for breaking down acrylic nails. You’ll want to use pure acetone, as other nail polish removers may not work as well.
- Cotton Balls or Pads: These will be used to soak up the acetone and wrap around your nails.
- Aluminum Foil: This will help keep the acetone in place as it soaks through the acrylic.
- Nail Buffer: A gentle nail buffer is useful for preparing your nails and smoothing them out once the acrylic is removed.
- Wooden Cuticle Pusher or Metal Cuticle Pusher: This tool will help you gently lift off any remaining acrylic once it starts to come loose.
- Nail Clipper: You’ll need this to trim down the length of the acrylic nails before soaking them.
- Petroleum Jelly (Optional): If you have sensitive skin around your nails, you can apply petroleum jelly around the cuticles to protect them from acetone.
Step-by-Step Process for Removing Acrylic Nails at Home
Step 1: Trim Your Acrylic Nails
The first step in the removal process is to trim your acrylic nails. Using a nail clipper, carefully cut the acrylic down to the shortest possible length. The shorter the acrylic, the easier it will be for the acetone to soak through and break it down. Be careful not to cut into your natural nail.
Step 2: Buff the Top Layer of the Acrylic
Using a nail buffer, gently buff the top surface of the acrylic nail. This will help to break the seal and allow the acetone to penetrate more effectively. Be gentle and avoid buffing too aggressively, as this could cause damage to your natural nails underneath.
Step 3: Soak Cotton Balls in Acetone
Soak cotton balls or pads in 100% pure acetone. You’ll want to make sure that they are saturated but not dripping. Acetone is strong, so make sure you’re working in a well-ventilated area to avoid inhaling fumes.
Step 4: Wrap Your Nails with Cotton Balls and Foil
Place the soaked cotton ball on top of your acrylic nails, making sure that it covers the entire nail. Then, wrap a small piece of aluminum foil around each finger to hold the cotton ball in place.
This helps to create a warm environment that speeds up the action of the action. Do this for all your nails and leave them wrapped for about 15 to 20 minutes.
Step 5: Check the Nails
After about 15 to 20 minutes, remove the foil and cotton balls from one of your nails to check the progress.
If the acrylic starts to lift easily, you’re ready to move on to the next step. If not, reapply the acetone-soaked cotton balls and foil and leave them on for an additional 10 minutes.
Step 6: Gently Push Off the Acrylic
Once the acrylic has softened, use a wooden or metal cuticle pusher to gently push off the acrylic from your natural nails.
Start at the cuticle area and carefully work your way toward the tip of the nail. Be patient and do not force the acrylic off, as this could damage your natural nails. If there are any stubborn spots, apply more acetone and repeat the soaking process.
Step 7: Buff and Smooth Your Natural Nails
Once all the acrylic has been removed, there may still be some residual roughness on your natural nails. Use a nail buffer to smooth out the surface of your nails. Buff gently to avoid thinning your nails.
Step 8: Moisturize Your Nails and Cuticles
After the removal process, your nails and cuticles may be dry or slightly irritated from the acetone. Be sure to hydrate your nails and cuticles by applying a nourishing cuticle oil or moisturizer. Massaging oil into your nails will help restore moisture and promote healthy nail growth.
Step 9: Give Your Nails Some Rest
It’s a good idea to let your natural nails rest for a few days after removing acrylic nails. Avoid applying new acrylic nails or polish immediately, as this can weaken your nails. During this time, focus on keeping your nails moisturized and healthy to allow them to regain strength.
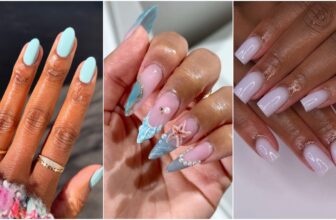
 Photo: Instagram/rrilinails
 Tips for Safely Removing Acrylic Nails at Home
- Avoid Forceful Removal: Never force acrylic nails off your natural nails, as this can cause serious damage. Patience is key.
- Hydrate Your Nails: Acetone can dry out your nails, so it’s important to rehydrate them after the removal process with oils and moisturizers.
- Use 100% Pure Acetone: Regular nail polish remover won’t work effectively for acrylic nails, so always use 100% pure acetone for the best results.
- Protect Your Skin: If you have sensitive skin, apply petroleum jelly around your cuticles to avoid irritation from acetone.
What to do if you experience nail damage
If you notice that your nails have become weak, brittle, or damaged after removing your acrylic nails, there are a few things you can do to help restore them:
- Nail Repair Treatments: Consider using a nail repair treatment to strengthen your nails and promote healthy growth.
- Biotin Supplements: Biotin is a vitamin that supports nail growth and strength. Taking biotin supplements may help your nails recover from damage.
- Regular Moisturizing: Continue moisturizing your nails and cuticles regularly to prevent dryness and breakage.
Removing acrylic nails at home is possible without causing damage if done correctly. By following these simple steps, you can safely remove your acrylic nails and keep your natural nails healthy and strong.
Remember to be patient during the process and avoid using excessive force. With the right tools, proper care, and a little time, your nails will look great and be free from acrylics in no time.
Photo: Instagram/nails_julianz
You May Also Like:
16 Nigerian Nail Artists Creating Some of the Most Detailed Sets on Instagram
March 20, 2026The 2026 Nail Trends You Should Know
January 29, 202635 Sweet and Romantic Valentine Nail Ideas You’ll Want to Bookmark
January 26, 202611 Lace Nail Ideas for the Perfect Vintage Manicure
January 19, 2026You Can Now Change Your Nail Colours with an App
January 13, 202617 Gold Nail Ideas You'd Want to Wear Now
December 27, 2025What You Need to Know About Nail Breakage: Causes and Solutions
December 22, 2025The Holiday Nail Polish Shades Everyone Is Wearing
December 17, 202514 Chic Ways to Wear Pantone's Cloud Dancer on Your Nails
December 9, 202511 Cute Halloween Nail Ideas To Enhance Your Spooky Look
October 8, 2025The Nail Shapes Everyone Will Be Wearing This Season
October 6, 202521 Skittle Nail Ideas That'll Give Your Manicure An Instant Upgrade
September 29, 2025

Esther Ejoh is a Fashion Editor at Fashion Police Nigeria, where she writes all things fashion, beauty, and celebrity style, with a sharp eye and an even sharper pen. She’s the girl who’ll break down a Met Gala look one minute, rave about a Nigerian beauty brand the next, and still find time to binge a movie or get lost in a novel. Style, storytelling, and self-care? That’s her holy trinity.